
The RIDGID Table Saw is a powerful tool designed for precision and durability, offering advanced features for professional-grade woodworking. This manual provides essential guidance for safe operation, maintenance, and troubleshooting to ensure optimal performance and longevity of your equipment.
1.1 Key Features and Benefits
The RIDGID Table Saw is engineered for precision and durability, featuring a powerful 10-inch blade, a sturdy cast iron tabletop, and a robust fence system for accurate cuts. Designed for both professionals and DIYers, it offers a reliable motor, easy adjustments, and safety features like emergency stops. Its compact design and portability make it ideal for job sites, while the heavy-duty construction ensures long-term performance. This saw combines versatility, power, and reliability for a wide range of woodworking tasks.
1.2 Importance of Reading the Manual
Reading the RIDGID Table Saw manual is crucial for understanding safety guidelines, proper operation, and maintenance. It provides detailed instructions to ensure safe usage and optimal performance. The manual highlights key features, troubleshooting tips, and warranty information. Familiarizing yourself with the content prevents accidents, extends the tool’s lifespan, and helps you make the most of its capabilities. Failure to follow the manual may void the warranty or lead to unsafe operating conditions.

Safety Precautions and Warnings
Adhering to safety guidelines is essential to prevent accidents. Always wear protective gear, avoid loose clothing, and ensure proper setup before operation to maintain a safe working environment.
2.1 Safety Signal Words and Their Meanings
The manual uses specific safety signal words to convey critical information. Danger indicates an immediate hazard that could result in serious injury or death. Warning signifies a potential hazard that could cause injury or damage. Caution alerts users to avoid actions that may lead to minor injury or equipment damage. Note provides important information for safe and effective operation. Understanding these signals is crucial for operator safety and proper equipment use.
2.2 Precautions Before Using the Saw
Always wear safety glasses, a dust mask, and keep loose clothing tied back. Ensure the work area is clear of debris and well-lit. Check for blade damage or wear before operation. Never wear jewelry that could get caught in moving parts. Use proper tools for adjustments to avoid injury. Ensure all guards are in place and functioning correctly. Keep children and pets away from the saw while in use. Proper preparation ensures safe and effective operation.
2.3 Emergency Procedures
In case of an emergency, immediately turn off the saw and disconnect the power supply. Do not panic; carefully assess the situation. If a blade binds, switch off the motor and allow it to stop completely before addressing the issue. For fires, evacuate the area and use a fire extinguisher rated for electrical fires. If injured, seek immediate medical attention. Always prioritize safety and follow proper shutdown procedures to prevent further incidents.
Assembly and Installation
Begin by carefully unpacking and inventorying all parts. Follow the step-by-step instructions to assemble the table saw, ensuring all components are securely fastened. Verify alignment and stability before first use.
3.1 Unpacking and Inventory of Parts
Begin by carefully unpacking the RIDGID Table Saw and its accessories. Inspect all components for damage. Verify the inclusion of essential parts, such as the table saw, stand, miter gauge, and rip fence. Check for smaller items like bolts, screws, and Allen wrenches. Cross-reference the contents with the parts list in the manual to ensure completeness. This step is crucial to avoid missing components that may delay assembly or affect performance. Contact RIDGID customer support if any parts are missing or damaged.
3.2 Step-by-Step Assembly Instructions
Begin by attaching the stand to the table saw using the provided bolts and Allen wrench. Ensure the stand is level and securely fastened. Next, install the rip fence by aligning it with the table and tightening the locking mechanism. Then, attach the miter gauge to the table slot, ensuring proper alignment. Follow the manual’s sequence to avoid errors. Refer to the parts diagram for clarification on component identification. Double-check all connections before first use to ensure safety and optimal performance.
3.4 Final Checks Before First Use
Before operating your RIDGID Table Saw, ensure all components are securely attached and properly aligned. Verify that the blade is installed correctly and the rip fence is locked in place. Check for any loose bolts or parts and tighten as needed. Inspect the saw blade for damage or debris. Ensure the table surface is clear and the area around the saw is free from obstructions. Finally, review all safety guidelines and ensure the saw is on a level, stable surface.
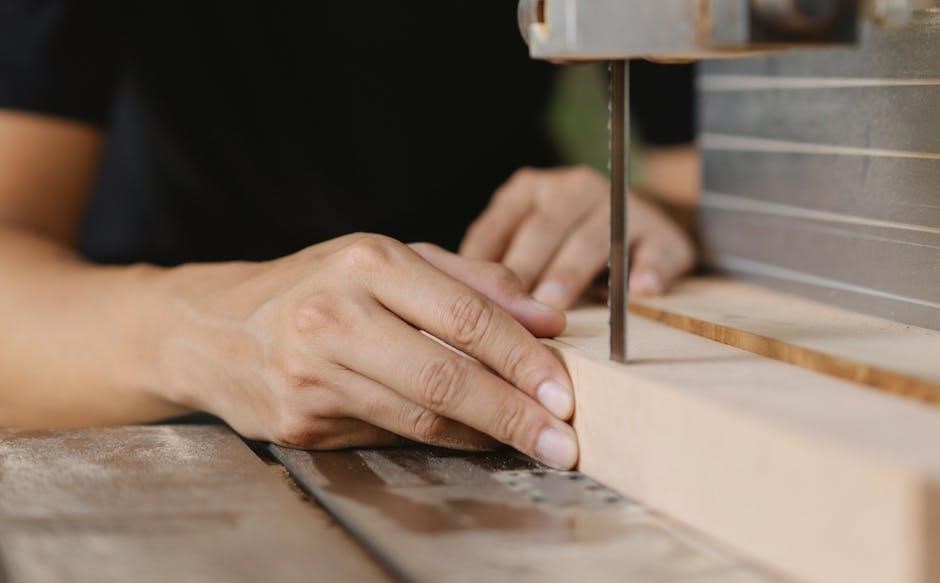
Operating the RIDGID Table Saw
Ensure proper alignment of materials and blade installation before use. Always follow safety guidelines and maintain a clean workspace for efficient and safe operation.
4.1 Understanding the Controls and Functions
The RIDGID Table Saw features intuitive controls, including a power switch, blade height adjustment, and miter gauge. The power switch activates the motor, while the blade height adjustment allows precise cutting depth. The miter gauge ensures accurate angled cuts. Familiarize yourself with these components to optimize performance and safety. Proper control operation enhances cutting accuracy and prevents potential hazards during operation.
4.2 Making Precise Cuts and Adjustments
To make precise cuts, align the fence with the blade and ensure it is parallel to the miter gauge slot. Adjust the blade height to match the material thickness for optimal performance. Use the miter gauge for angled cuts, ensuring it is securely locked. Always check the blade alignment and tighten it before cutting. For accurate results, maintain a firm grip on the workpiece and consider using a push stick or other safety tools to guide materials through the saw.
4.3 Optimizing Performance for Different Materials
For optimal performance, select the right blade type based on the material—carbide-tipped for hardwoods, steel for softwoods, and specialty blades for unique cuts. Ensure the fence and blade are properly aligned with the material. Adjust the blade height to match the stock thickness and maintain sharpness for clean cuts. Regularly clean debris and maintain proper blade tension to prevent wear and ensure consistent results across various materials.

Maintenance and Troubleshooting
Regularly clean the table and components, check blade alignment, and lubricate moving parts. Address common issues like uneven cuts or motor noise promptly to maintain performance and safety.
5.1 Routine Maintenance Tasks
Regular maintenance ensures optimal performance of your RIDGID Table Saw. Start by cleaning the table surface and removing debris. Check and tighten all bolts and screws, especially around the blade and motor. Lubricate moving parts like the trunnion and fence rails. Inspect the blade for dullness or damage and replace it as needed. Finally, ensure the power cord is undamaged and all safety features are functioning properly. Consistency in these tasks prevents downtime and enhances safety.
5.2 Common Issues and Solutions
Common issues with the RIDGID Table Saw include blade misalignment and uneven cuts. To fix, recalibrate the fence and ensure the blade is parallel to the miter slot. Motor overheating can occur; allow it to cool before resuming use. If the saw vibrates excessively, check for loose parts and balance the blade. For electrical issues, inspect the power cord and ensure all connections are secure. Refer to the manual for specific troubleshooting steps to resolve these problems effectively.
5.3 When to Contact Customer Support
Contact RIDGID customer support if you encounter issues not covered in the manual, such as complex repairs or unclear instructions. Seek assistance for major mechanical or electrical malfunctions. Additionally, reach out for warranty-related inquiries or replacement parts. Always have your model number and serial number ready for efficient service. This ensures timely resolution and maintains your saw’s performance and safety standards.
Accessories and Optional Upgrades
Enhance your RIDGID table saw with essential accessories like stands, miter gauges, and dust collection systems. Optional upgrades, such as advanced fences or digital readouts, improve functionality and precision.
6.1 Recommended Accessories for Enhanced Functionality
For optimal performance, consider adding a sturdy stand, precision miter gauge, and efficient dust collection system. These accessories improve stability, accuracy, and workshop cleanliness. Additional options like a rip fence upgrade or outfeed table enhance cutting efficiency and material support. Explore RIDGID’s range of compatible accessories to tailor your table saw to specific woodworking needs and preferences.
6.2 Upgrading Your Table Saw for Better Performance
Enhance your RIDGID table saw’s capabilities by upgrading key components. Consider a high-torque motor for increased power or a premium blade for smoother cuts. Upgrading the fence system improves accuracy, while a dust collection upgrade reduces workplace debris. Additional enhancements like a feeder system or advanced drive belts can boost efficiency and precision. Always ensure compatibility with RIDGID specifications to maintain optimal performance and safety standards.

Parts Diagram and Replacement
Refer to the detailed parts diagram in your RIDGID Table Saw manual for easy identification of components. Order replacement parts online through authorized RIDGID distributors for genuine quality.
7.1 Identifying Key Components
Use the parts diagram in your RIDGID Table Saw manual to identify key components such as the miter gauge, blade, and rip fence. Each part is numbered and named for easy reference. Locate the motor, dust collection port, and safety features like the blade guard. Understanding these components ensures proper assembly, maintenance, and operation. Refer to the manual or online resources for detailed descriptions and part numbers to assist with repairs or replacements.
7.2 Ordering Replacement Parts Online
To order replacement parts for your RIDGID Table Saw, visit the official RIDGID website or authorized retailers like ridgidparts.com. Use the parts diagram in your manual to identify the correct part numbers. Search by model number or part name, add items to your cart, and proceed to checkout. Ensure compatibility by verifying model numbers before purchase. For assistance, contact RIDGID customer support or refer to the manual for guidance on ordering genuine parts securely online.
Warranty and Customer Support
Your RIDGID Table Saw is backed by a comprehensive warranty ensuring coverage for defects in materials and workmanship. Contact RIDGID customer service for assistance with warranty claims, troubleshooting, or repairs. Visit ridgid.com for detailed warranty terms and support options, ensuring your tool performs optimally for years to come.
8.1 Understanding Your Warranty Coverage
Your RIDGID Table Saw is protected by a limited warranty covering defects in materials and workmanship for a specified period. The warranty duration varies by product, typically ranging from 3 to 5 years. Coverage includes repair or replacement of defective parts at no cost. Registration is recommended to validate your warranty. For detailed terms, visit the RIDGID website or contact customer support. Proper maintenance and adherence to guidelines ensure warranty validity, providing peace of mind for your investment.
8.2 Contacting RIDGID Customer Service
For assistance with your RIDGID Table Saw, contact customer service via phone, email, or the official website. Visit ridgid.com/support for comprehensive resources, including FAQs and repair parts. Ensure to have your model number and serial number ready for efficient support. Representatives are available to address warranty claims, troubleshooting, and general inquiries, providing expert help to resolve issues promptly and effectively, ensuring your tool performs optimally.

Advanced Techniques and Tips
Master complex cutting operations and customize your setup for enhanced precision. Explore advanced techniques for optimizing performance with various materials and projects, ensuring professional-grade results consistently.
9.1 Mastering Complex Cutting Operations
Refine your skills with advanced cutting techniques tailored for precision and efficiency. Learn to optimize blade angles, manage diverse materials, and execute intricate cuts seamlessly. Adjustments for thickness, bevels, and miters ensure accuracy. Utilize the saw’s full potential by mastering rip cuts, crosscuts, and compound cuts. Explore tips for maintaining consistent results and adapting to challenging projects, enhancing your woodworking capabilities and achieving professional-grade outcomes consistently.
9.2 Customizing Your Table Saw Setup
Enhance your table saw’s functionality by tailoring it to your specific needs. Install custom jigs, auxiliary fences, or specialized cutting aids for precise cuts. Align the fence and blade regularly for optimal accuracy. Consider upgrading to premium blades or adding a mobile stand for improved versatility. Experiment with material-specific settings to optimize performance. Personalize your workspace with storage solutions like tool hooks or bins. Troubleshoot common issues to ensure your setup remains efficient and reliable over time.

Environmental and Storage Considerations
Store your RIDGID Table Saw in a dry, clean environment to prevent rust and damage. Follow eco-friendly practices by recycling packaging materials and properly disposing of worn parts.
10.1 Proper Storage to Maintain Performance
Store your RIDGID Table Saw in a clean, dry environment to prevent rust and damage. Use a protective cover to shield it from dust and moisture. Avoid storing in areas with extreme temperatures or humidity. Clean the saw thoroughly before storage and ensure all parts are dry. Regularly inspect for wear or damage. Proper storage ensures optimal performance and extends the lifespan of your equipment for years of reliable service.
10.2 Eco-Friendly Practices with Your Table Saw
Adopt eco-friendly practices by recycling materials and minimizing waste during woodworking projects. Use energy-efficient settings and eco-friendly finishes. Regularly maintain your saw to prevent unnecessary repairs and reduce environmental impact. Properly dispose of sawdust and debris to avoid contamination. Consider using sustainably sourced lumber and follow local environmental guidelines to promote responsible woodworking practices and reduce your ecological footprint.
No Responses